Hints, Tips and Recommendations:
Making Local Changes to Parts of an Image with Masking
in Adobe Lightroom or Camera Raw
Masks Adjustment Brushes and Gradient Filters
In addition to making global changes throughout an image it is often desirable to make local changes to parts of an images. Most general purpose editing programs, such as Adobe Camera Raw (ACR) or Lightroom, offer that possibility when used in conjunction with masks that restrict changes to specific area of the image.
In Autumn 20121 Adobe made updates so many instructional images on this page became outdated. The latest features for working with selected bits of an image are nicely demonstrated in 2 videos by Colin Smith of PhtoshopCafe.com. The second video shows more advanced features.
Use These Tools in Photoshop
Rather than reinventing the wheel Adobe made these tools available in Photoshop via the Filter > Camera RAW Filter … menu option.
Convert for Smart Filters if using these tools. That way the effects become re-editable and can be painted out with a mask or gradient. Photoshop menu Filter > Convert for Smart Filters
Learn to Use the Options For the Tools
The options for the brush tool are very important in aiding you to achieve your desired effect.
Brush Feathering makes the edge of the brush ‘soft’. In other words it fades out the effect at the edge of the area affected so the edit is not easily noticed. The larger the feather diameter the softer edged the brush will be.
Flow sets how much of the effect is added with a single brush stroke. At 100% the effect is complete with one ‘brush stroke’. With smaller percentages the effects can be ‘brushed in’ with repeated strokes.
Density sets a limit on how much of the effect is applied. At 90% density a brush will have a much more noticeable effect that 30%.
Auto Masking is a very important refinement because, when used, it will help you to restrict the effect of the brush within edges of areas of the images that you wish to modify. It does so by restricting the effect to the same colour range.
Learn Important Keyboard Shortcuts for the Tool Options
Learn the keyboard shortcuts for features of a program that you use frequently and it will save you time.
For the Brush Tool:
] increases brush size
[ decreases brush size
n selects a new tool of the same type you are already using. So if you are using the Brush n will give you a new brush (the same applies to the gradient filters)
Shift +Control+ v + left click drag changes brush feathering (without having to use the slider option)
Selective Editing Characteristics of the Locally Applied Tools
Each brush or filter gradient that is applied can locally change many image characteristics simultaneously. This is much more useful and very much faster than doing the equivalent in Photoshop where such functionality does not exist, except by calling the RAW Converter.
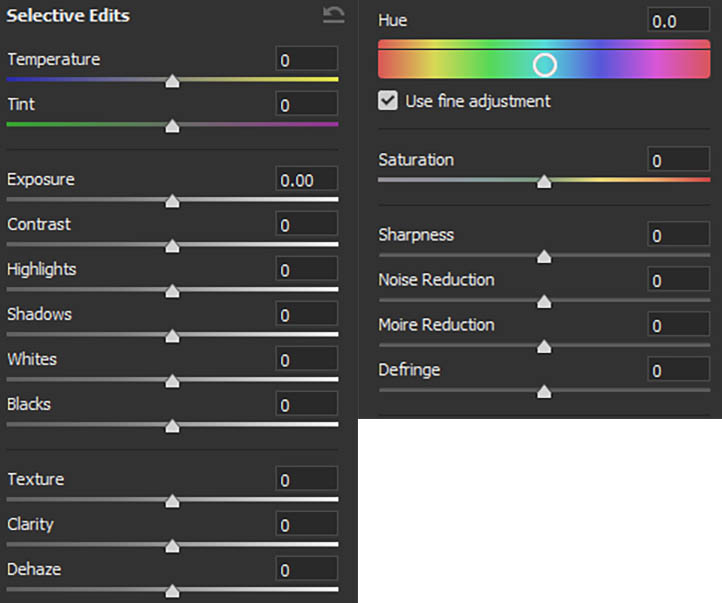
If using these tools in Photoshop convert the images to a ‘Smart Object’ first using menu option Filter > Convert for Smart Filters. That way the effects become re-editable and can be painted out with a mask or gradient.
Adobe have an excellent non-technical written description of tool characteristics.
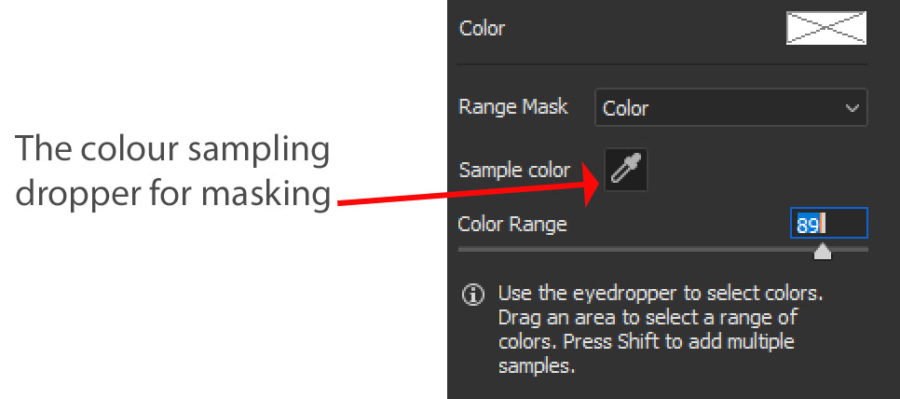
Restricting the Effect of the Tools by Colour or Luminance Masking
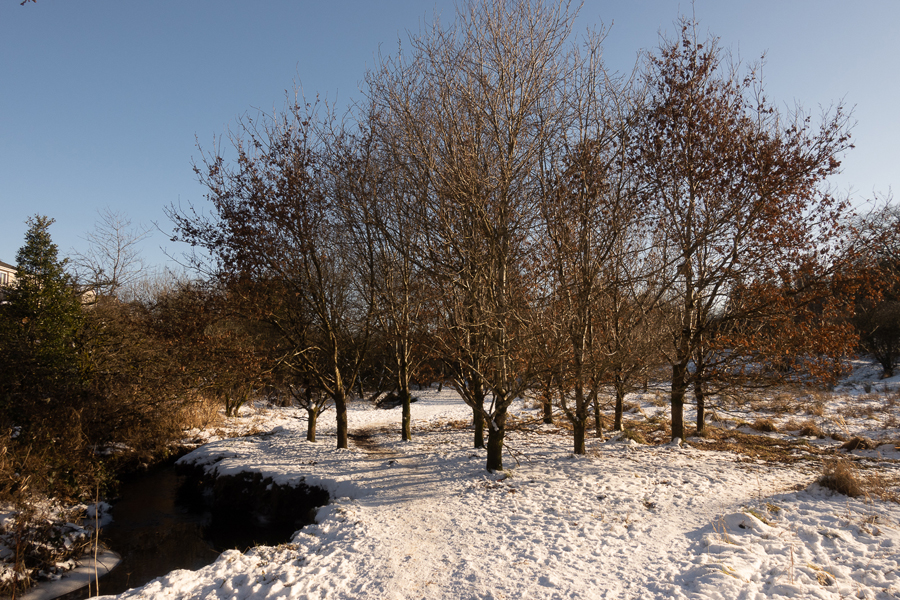
In the example below the dark portion was brightened with the Adjustment Brush Tool (shortcut k). A second brush was used to remove noise in the reflections of the sky. The noise reduction effect was restricted to the blue areas of the images by Colour Masking. It is also possible to restrict by Luminance (Brightness) Masking instead of colour (but not both at once). A third Brush was used to change the colour balance of the snow to make it more blue.
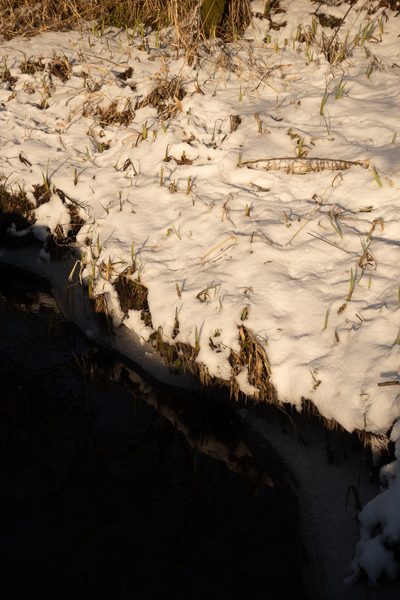
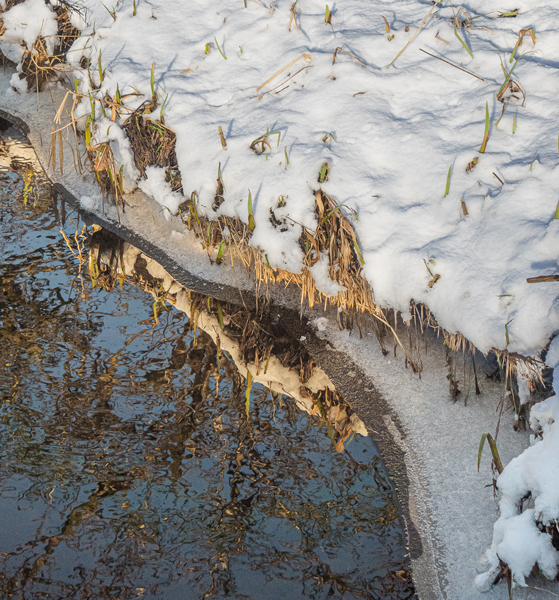
The image noise was more obvious in reflections of the blue sky because it lacks other detail, so noise reduction was confined to those areas.
The second Adjustment Brush in Adobe Camera Raw (shortcut k) was restricted by colour masking. In effect the image was painted or brushed with noise reduction in a way that was dependant on colour. The white dots mark the other 2 unselected Adjustment Brushes used on this image. To create a new Brush in ARC when the brush tools is already selected use the keyboard shortcut n.
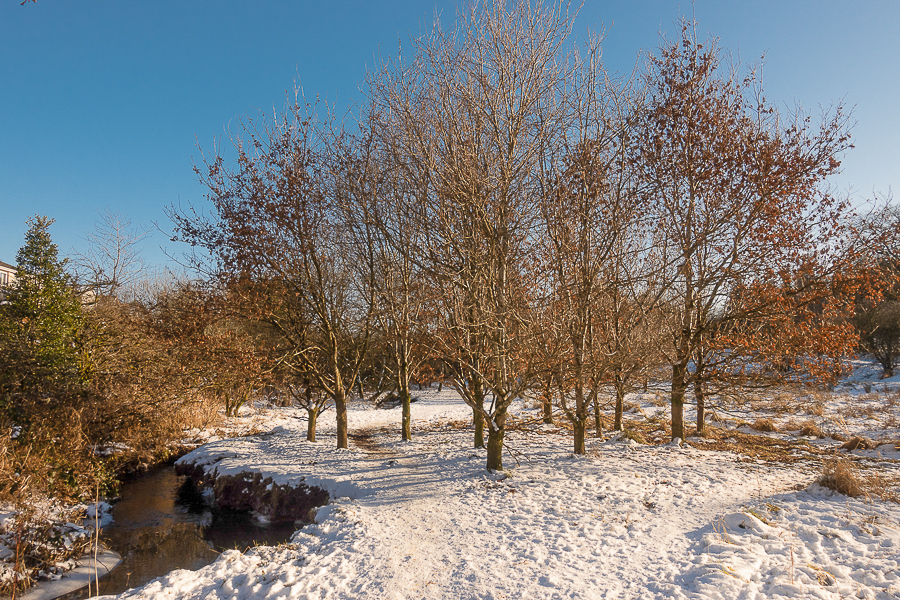
Restricting the Area Affected by a Brush with Luminance Masking
The darker area of the trees was made brighter with an adjustment brush. The effect of the brush was restricted by luminance masking so that only the darker tones were changed.
Luminance Masking of the Adjustment Brush restricted the effects of the brushed area to the dark tones (i.e. the lower luminance range) of that part of the image.
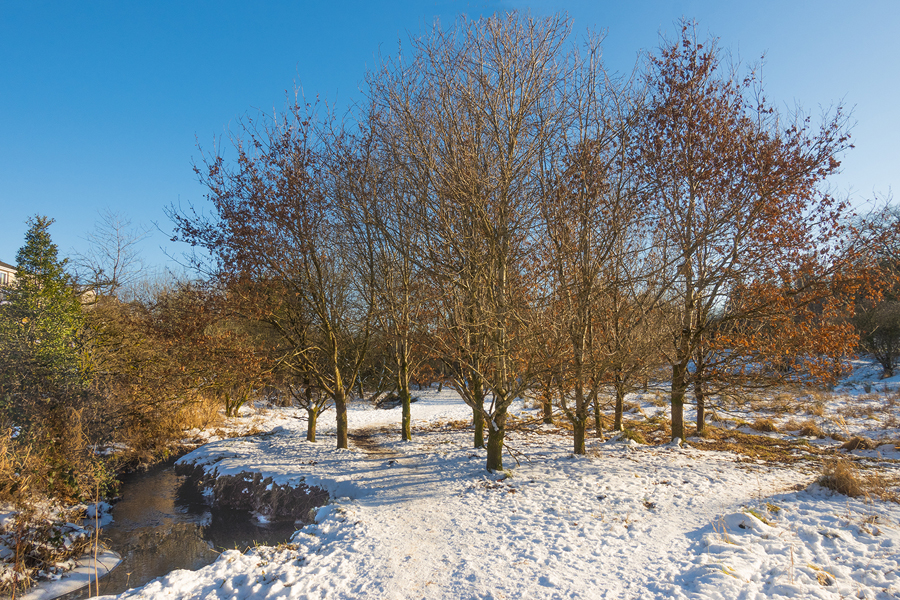
Colour Masking of a Gradient Filter Used on the Sky
The effect of gradient filter can be restricted either by colour
The effect of a Gradient Filter was restricted to the sky by colour masking. This was done by drawing a long horizontal rectangular box on the sky with the masking dropper tool.
Use of masking of the Gradient Filter is explained in this short video on the official YouTube Photoshop Channel.
Before and After Editing Examples (taken with a Very Small Pocket Camera)
A RAW format capture without any software adjustments
After Editing with the ‘Basic’ Sliders only in ARC
After Editing in Adobe Raw Converter. The tops of the trees were subsequently removed in Photoshop
When raising the brightness of areas in shadow, which are by definition illuminated by bluer light, change the colour temperature slider to more yellow. Otherwise, after brightening, the shadows will look unnaturally blue, especially in snow.
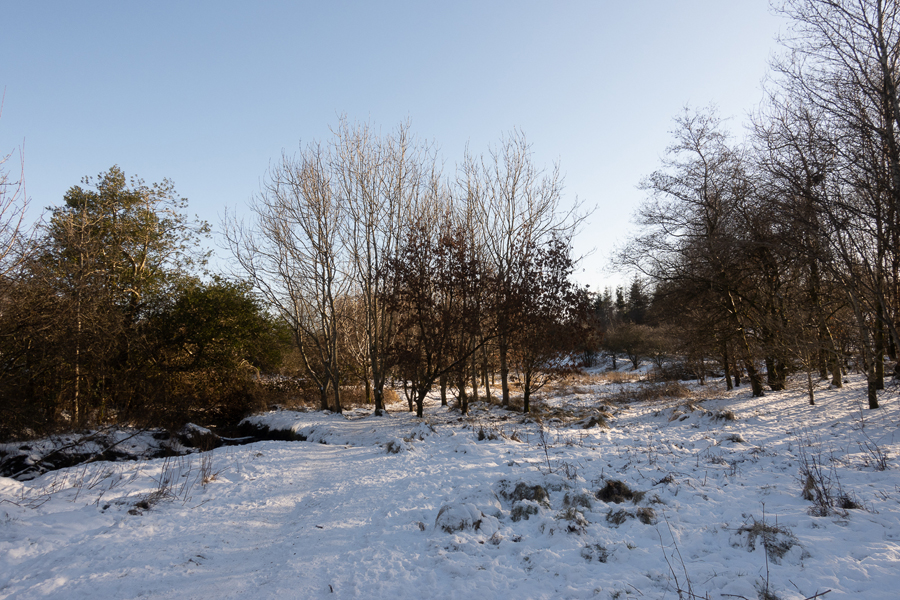
Before editing with the Adobe Raw Converter. This is a challenging scene to capture correctly with the small sensor of a pocket camera because it has a very bright sky and deep shadows. Some of the dark areas of branches are in shadow but surrounded by light background of trees that are directly illuminated by the sun. Some of the snow is being illuminated directly by the sun and other parts by the blue sky so they are different in colour.
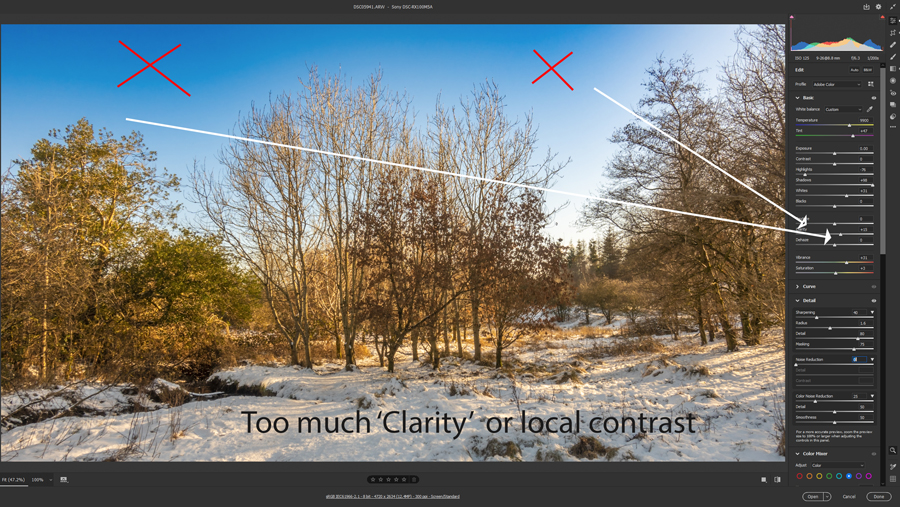
Go Easy on the Sliders
Do not apply effects that lead to obvious artefacts such a very large halos in brightness and saturation, like that shown below.
An Good Example Edit in Adobe Lightroom
Please remember that it is important ensure that you capture a suitable exposure to produce a final image.
This video shows how careful exposure combined with some simple creative editing in Adobe Photoshop Lightroom (or Adobe Camera Raw.) can produce a pleasing result.
There is Better Selectivity of Colour Editing in Photoshop
The Hue Saturation editing panel in Photoshop allows more complex modification of selected colours because of the ability to specify and fade out effects over narrow colour ranges. These effects can then be coupled with different blending modes.
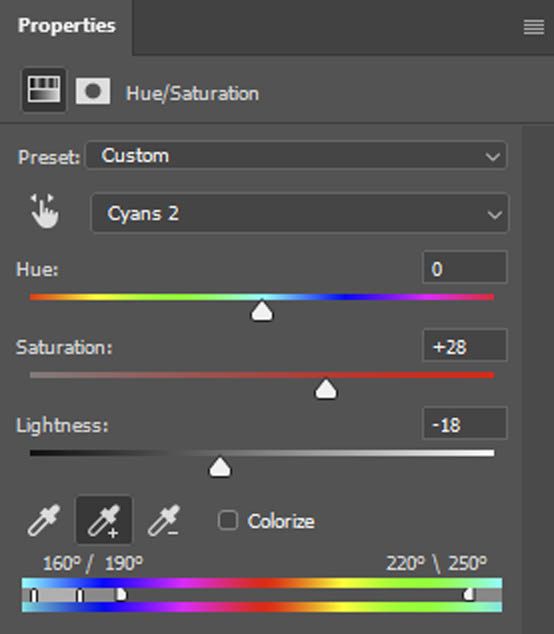
The Hue Saturation Lightness Panel in Photoshop has sampling droppers, sliders and fade-out sliders that enable more selective changes to be made to particular colours.
Tips and Images by: Steve Campbell
Next: Camera Raw and Lightroom>