Hints Tips and Recommendations:
Image Editing or Post-Processing
Before You Start
a) Shoot in RAW image format if your camera has that facility. This makes editing easier and more powerful. Producing JPEG compressed files with your camera can create unfixable problems, especially in more challenging photographic situations. Even some phones can save in RAW format.
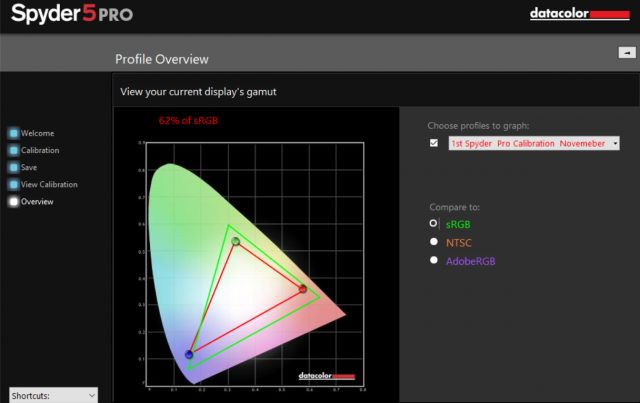
b) Calibrate your display if you use a Windows computer. See our Screen Calibration and Colour Space page.
Essential Editing For Beginners
Cropping
The most obvious feature to learn in any image editing software is how to crop. The crop function (or tool) is often accessed by pressing the letter C on the keyboard in programs designed for English speakers.
The other basic aspect of cropping is learning how to rotate or tilt a crop.
Understanding the Histogram
You will almost inevitably make mistakes when editing if you ignore the image histogram display, which is a crucial part of all good image editing programs. The free Google Snapseed for Android and iOS even has a histogram display (see our phone apps page).
The simple image histogram “acts as a graphical representation of the tonal or brightness distribution in a digital image“.
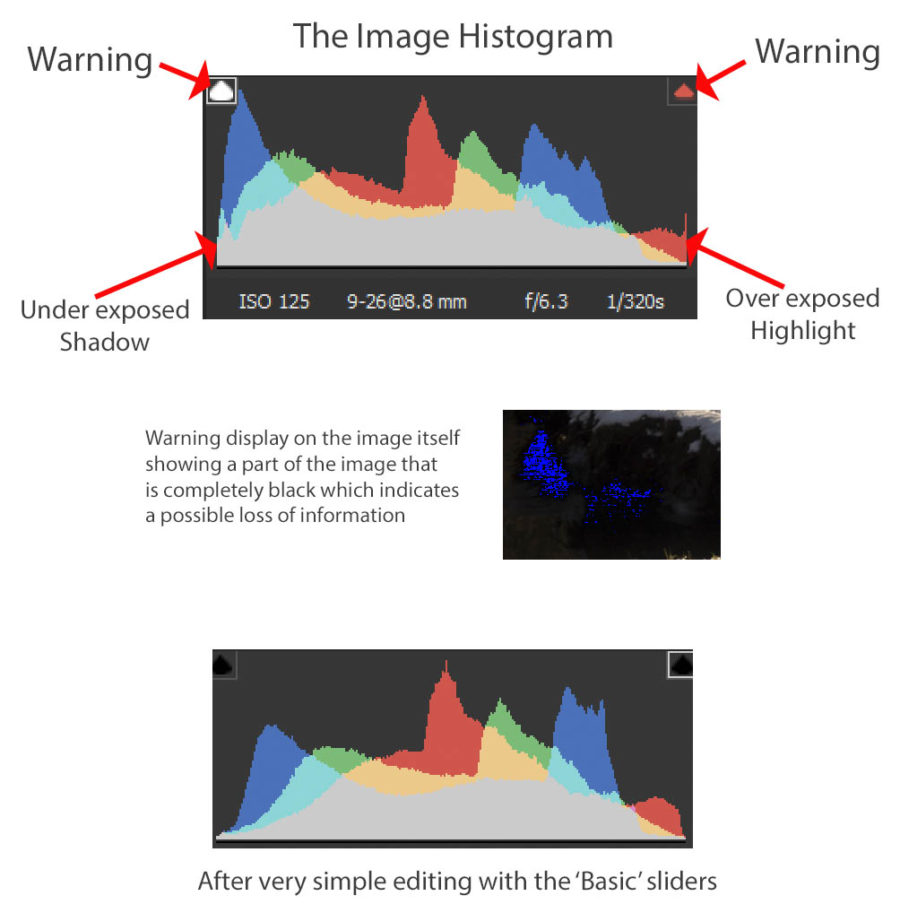
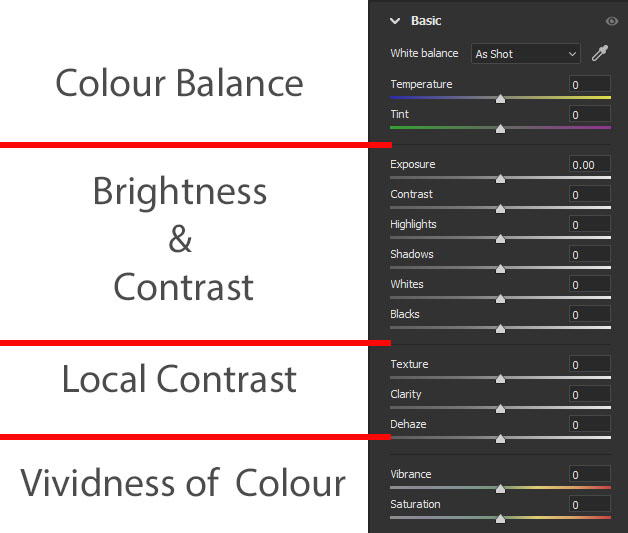
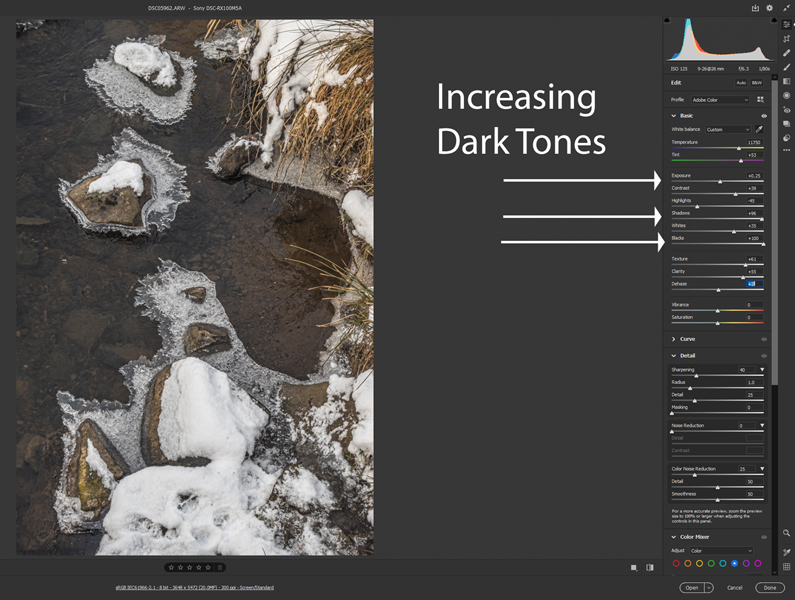
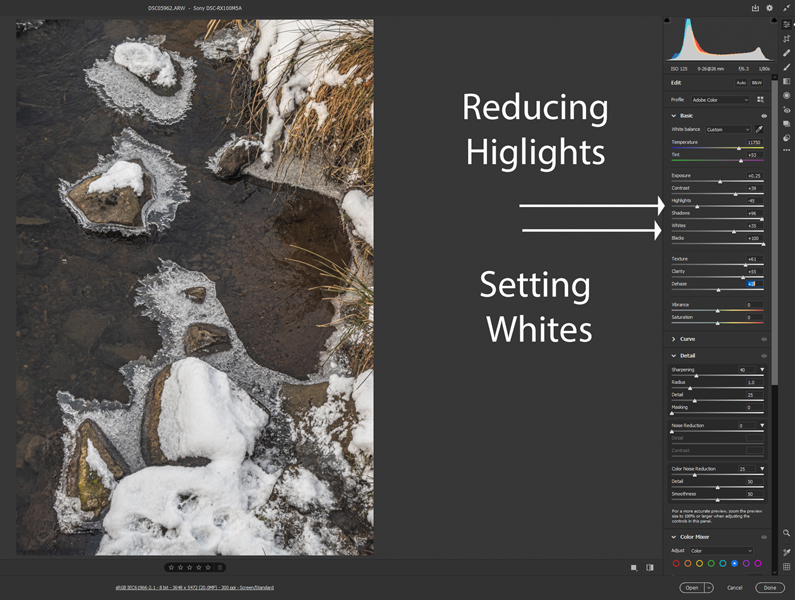
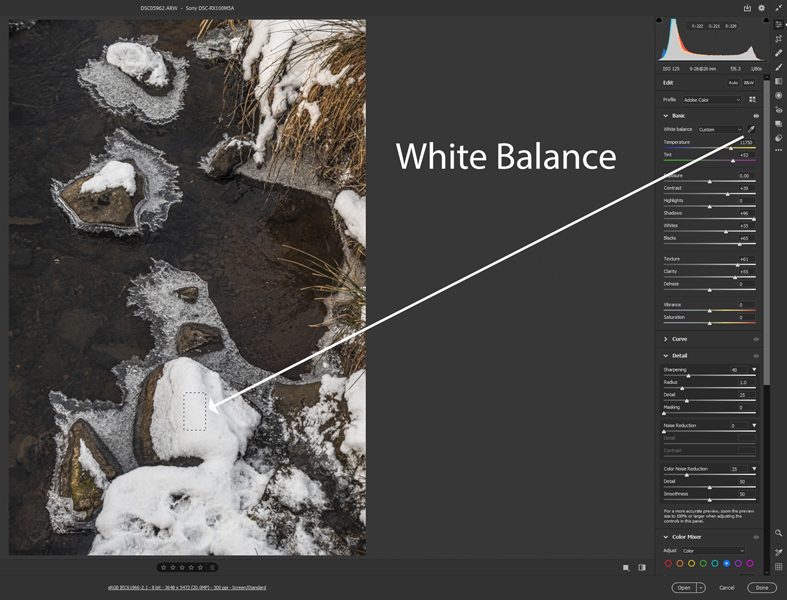
The ‘Basic’ Editing Sliders
Many image editing programs have a set of sliders that do the most basic and most important steps of initial editing. All you have to do is move the slider and watch what happens to the images AND the histogram. Note: Photoshop does not have such a basic tool so, if you are using Adobe products, start with Lightroom or Camera Raw to begin the editing process.
In Adobe Camera RAW the ‘Basic’ Editing Sliders fall Into four categories, Colour Balance, Brightness and Contrast, Local Contrast, and Colour Vividness (or Saturation). [Saturation is the “colourfulness of an area judged in proportion to its brightness”]
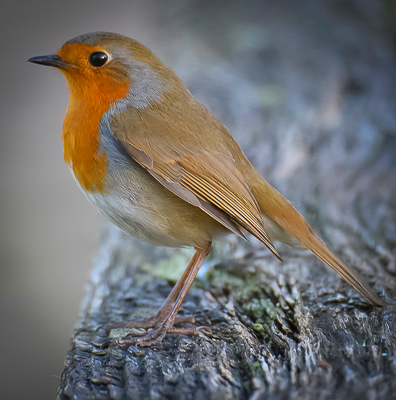
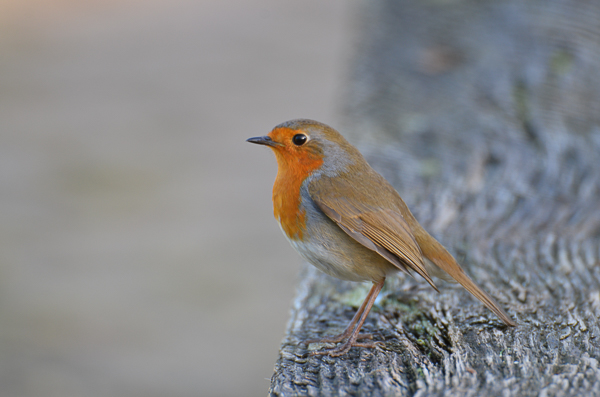
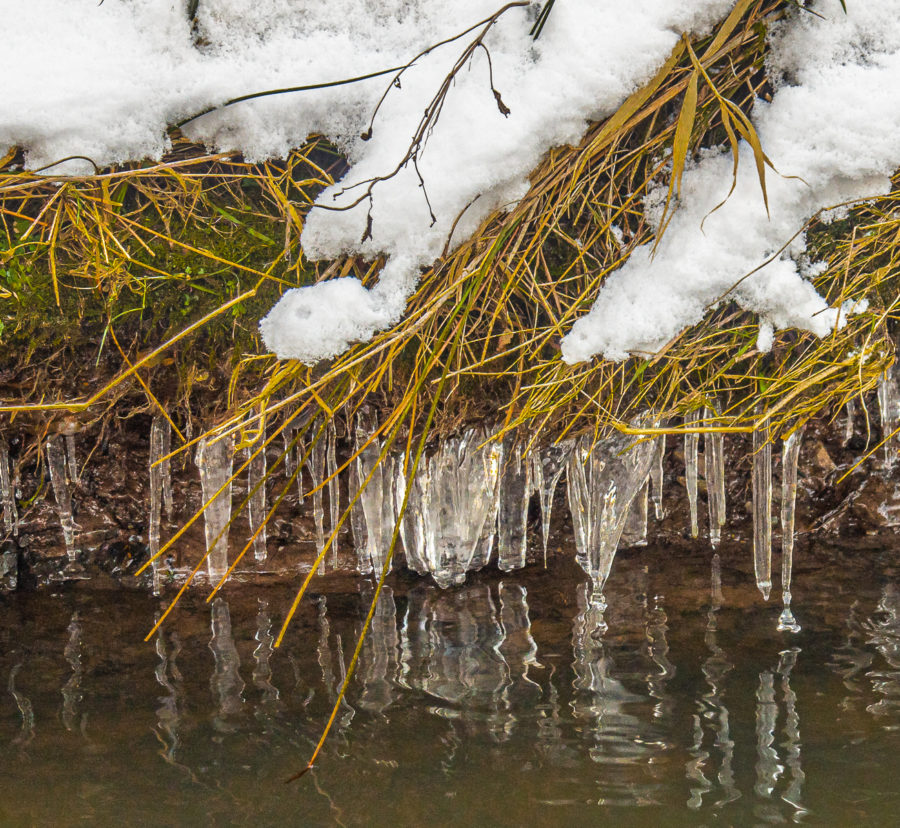
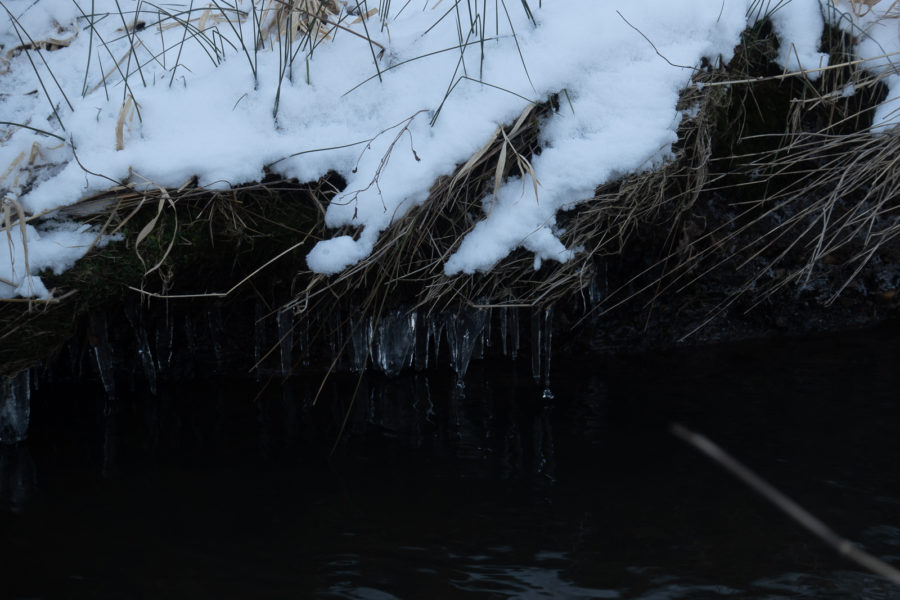
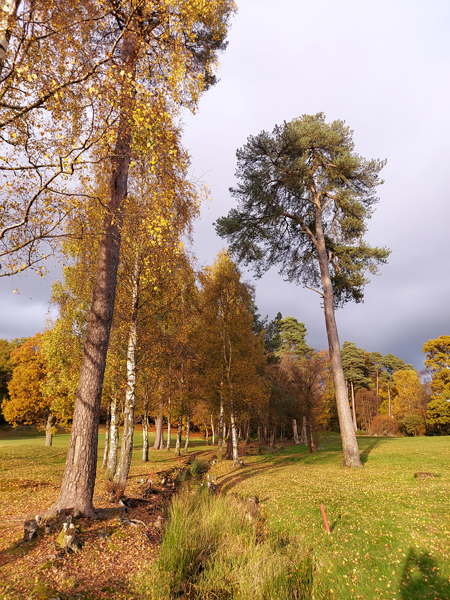
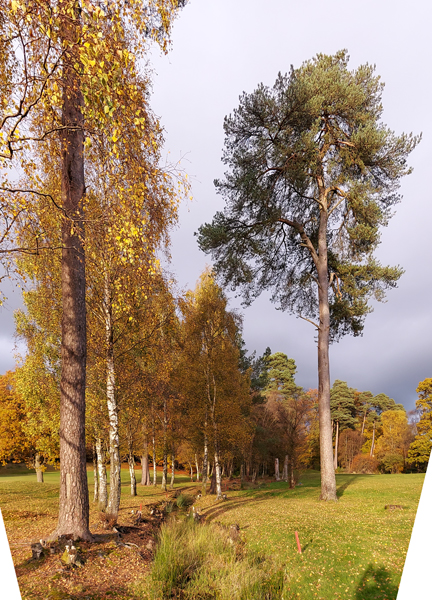
An Example of Using the Crop Tool and ‘ Basic’ Sliders to Edit a RAW Format Image Captured with a Pocket Camera
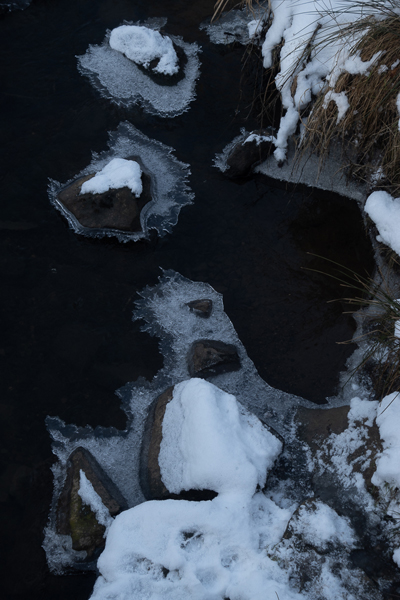
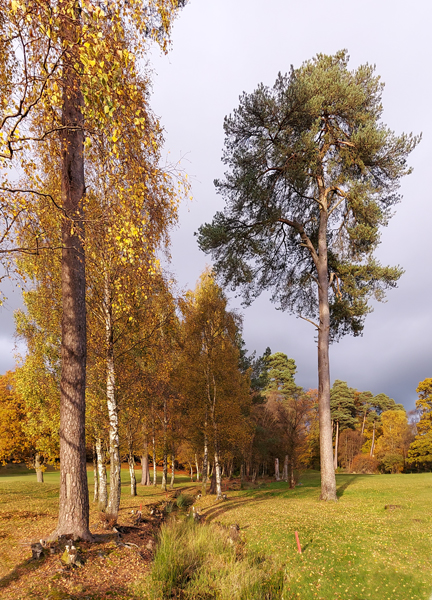
Another Example of Editing a RAW Format Image Captured with a Small Pocket Camera
Another Way to Change Contrast and Brightness
Use ‘curves’ in either Lightroom, Camera Raw, Photoshop, or many other image editors, to change the black point, white point, contrast and overall brightness.
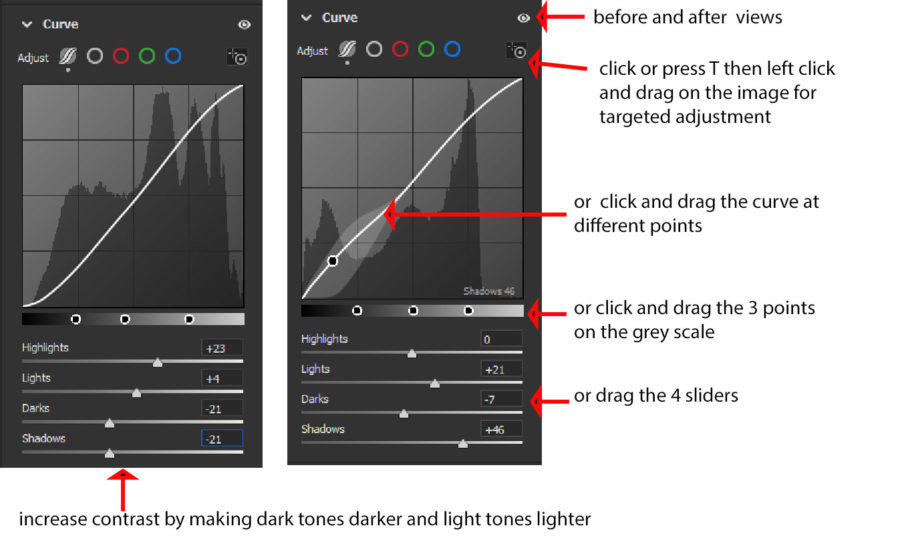
If you use each of the Red, Green and Blue channels curves independently various colour effects can be created. Find a good instructional video or read the Adobe Curves overview if you are struggling to use or understand curves.
Increasing Sharpness and Reducing Noise in Areas of Low Contrast Variation
When capturing in RAW file format the images are not been sharpened so some sharpening should be applied. Any noise present that will have been especially in dark areas will be exaggerated by sharpening and so should be reduced. Keep noise reduction sliders as low as possible.
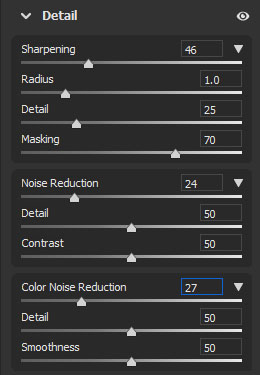

In the Adobe RAW Converter press the ALT key while dragging the masking slider. Sharpness will not be applied to areas in black that lack small details. Sharpening of areas that lack detail is pointless, because there is nothing to sharpen and also makes image noise more obvious.
Correct Geometric Distortions Produced by Tilting Your Camera Up or Down
When you tilt you camera up to photograph a tall tree or a building parallel lines converge to a vanishing point. If is very easy to correct this kind of distortion using the sliders that geometrically transform the image.
Tips and most images by: Steve Campbell