Hints, Tips and Recommendations:
Close-up and Macro
Use the Correct Gear
The cheapest and quickest way to start close-up photography is to try using your existing lenses, compact camera or phone. Long focal length zoom lens can be used to photograph butterflies for example. The widest focus setting of an optical zoom will allow the closest approach. However for very small things that is probably not going to work unless you have some of the equipment described below.
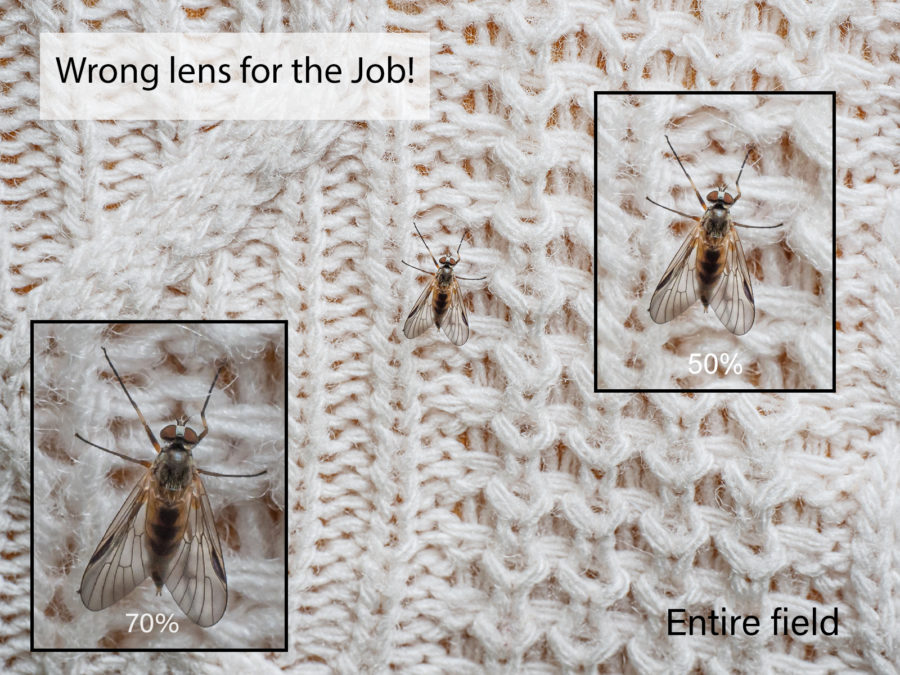
A small fly landed on my wife’s back when I had a high quality 12-100mm Pro zoom lens on my little Olympus EM1 ii. As you can see, it was the wrong lens for the job of recording fine details of the insect, although the jumper pattern and fibres of the wool are well captured.
Do Not Go Too Close to the Subject: Phone Camera Example
Regardless of what equipment you use, do not go closer than you need to the subject in order to capture the desired image. This will give you maximum depth of focus. It might be better to zoom optically from further away using longer focal length rather than coming close to the subject.

Not going in too close with a phone camera often produces better results. The colour balance is a bit blue in this image.

Phone camera image taken far too close to the subject. The depth of field is too shallow and there is distortion and horrible peripheral blurring of the lens.
Phone Macro
For closeup photography with a phone (such as the Samsung S10 lite, examples above and shown below) it can sometimes be best to ignore any built in macro camera and use the main camera sensor.
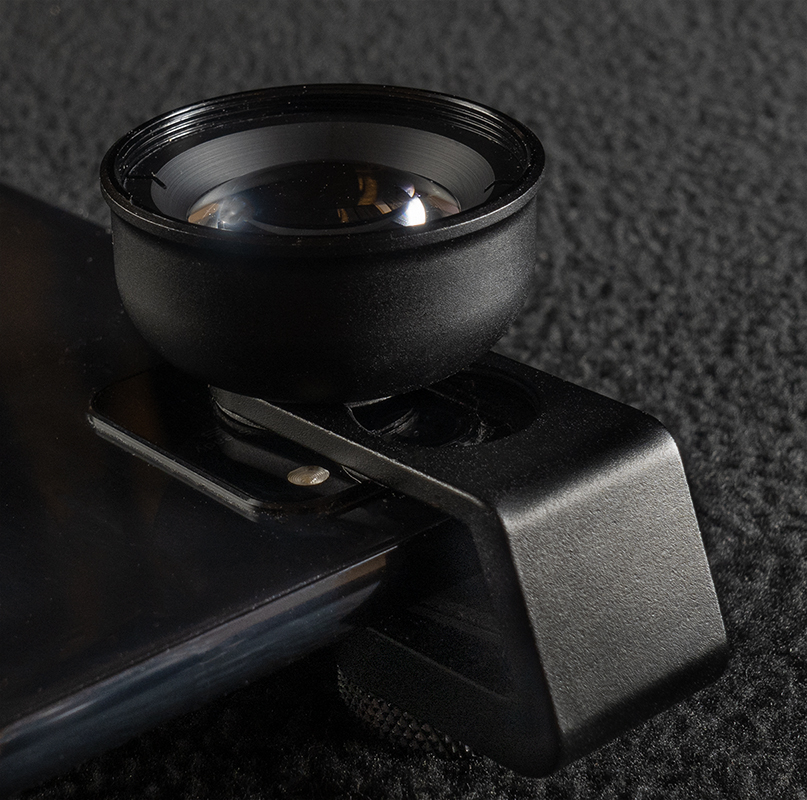
Phone with a supplementary macro lens. This arrangement is a hard to use, has a very shallow depth of field and should be seen as just for fun rather than producing serious pictures. Using the main sensor with this lens gives better results than using the phone’s macro camera. Image captured with the Sony RX100 VA.
If the main lens and camera or your phone produces distortion and peripheral blur and artefacts when closely focused, set the focus to infinity in pro or advanced mode and use a clip-on lens. That way even although the magnification might be less the image quality will be better.
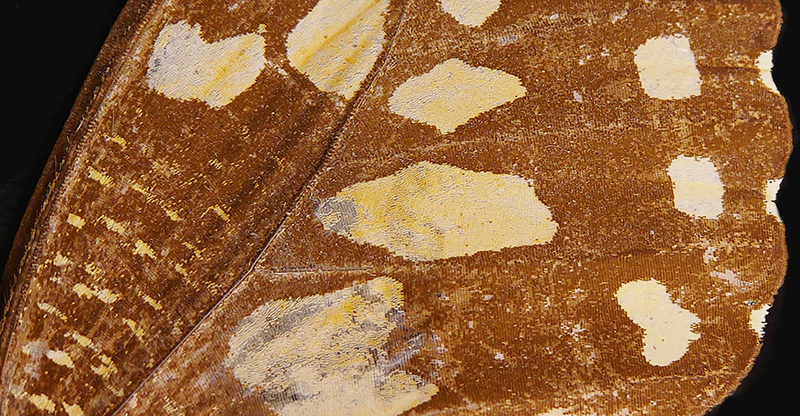
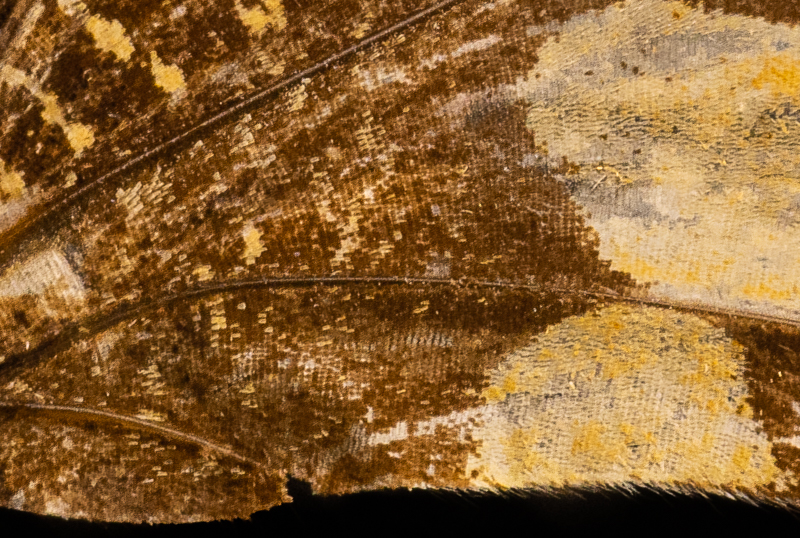
A close-up of a butterfly’s wing taken with the phone and supplementary lens shown above. The scale pattern is barely visible.
Choosing a Compact Camera for Macro
Check the macro performance of a compact camera or camera lens before buying. The distance of closest focus, field size or an explicitly stated magnification are useful when reading specifications in advance of purchase. (See this example of a Sony compact camera with a close focus point of 8cm at wide angle.) If you are buying a compact camera in a shop check how close can you bring the front of the lens to the text on the price tag? Try zooming in and zooming out. Wide angle allows you to get closer but can introduce distortion, which is sometimes not noticed but can be more problematic on text or small man-made objects.
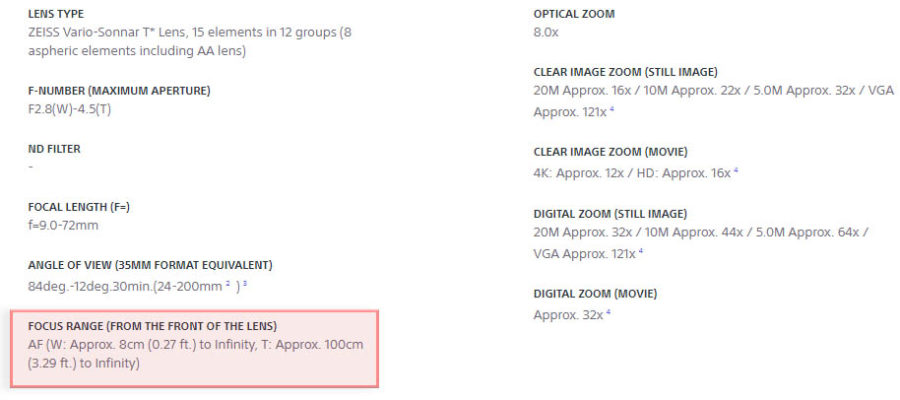
Sony DSC-RX100M7 compact Camera lens spec When fully zoomed out the closest approach is 1 metre but only 8cm when the lens is used at maximum wide angle.
Macro with Extension Rings
If you want to increase magnification with your existing interchangeable lenses, use a set of automatic extension rings (sometimes called tubes) that maintain the electrical connections of the camera body to the lens.
Do not waste your money on cheap rings that do not have metal contact plates and spring loaded connector pins. Rings (or tubes) have no lenses and produce their effect by moving the lens further from the sensor. They are also very light and compact to carry. Sometimes one ring is enough. Remove the rings when you need to return to conventional photography. Store the rings with their caps on to minimise dust in your camera.
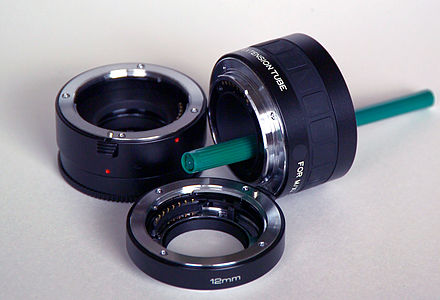
A set of extension tubes with a pen illustrating the lack of internal lenses
Source: https://en.wikipedia.org/wiki/File:ExtensionTube5733.jpg
Even if you later buy a macro lens the extension rings will still come in very useful, as shown below.
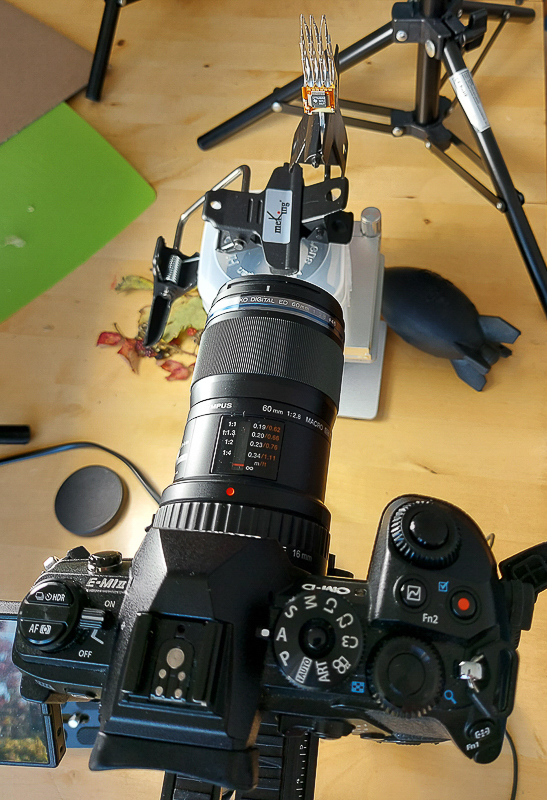
Olympus 60mm macro lens and one 16mm extension ring being used to photograph a 7 mm wide microprocessor on a computer hard disk read/write head. Picture taken with a phone.
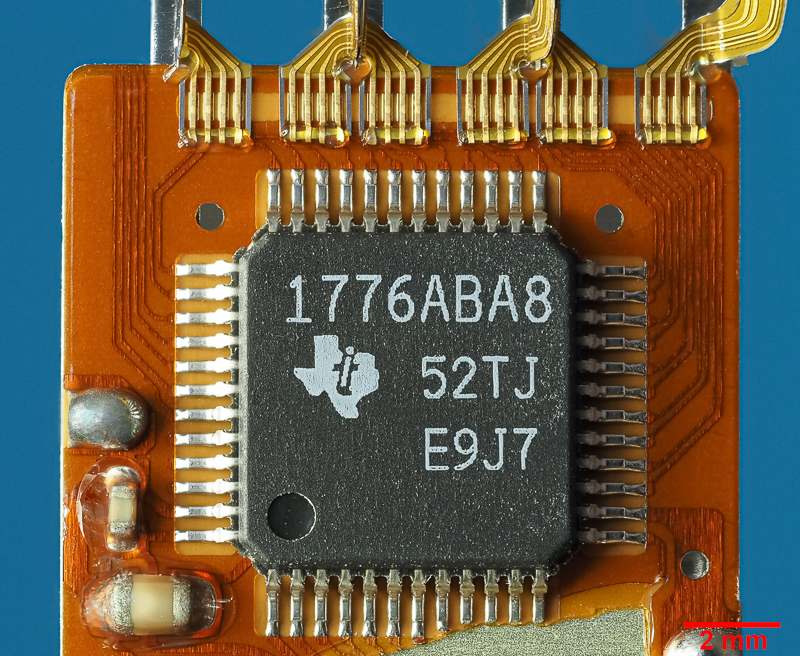
A Texas Instruments microprocessor taken with the equipment shown above.
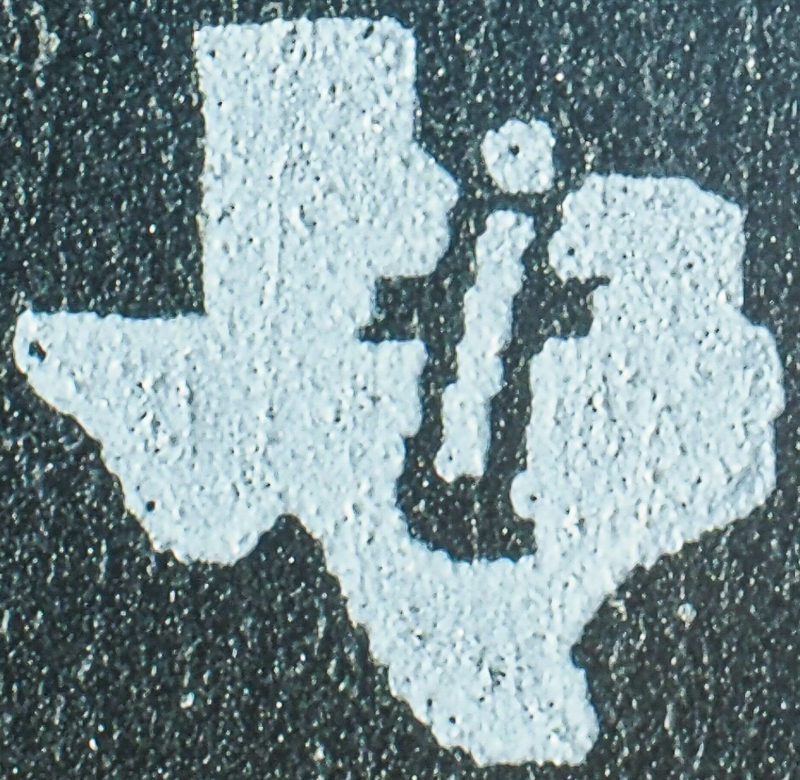
Detail of the ‘Texas Instruments’ icon on the processor above taken in normal resolution mode using the Olympus 60mm lens, 42mm extension and a Raynox 250 Supplementary lens.
Using a Supplementary Magnifying Lens
An alternative (or addition) to extension tubes is a good quality magnifying lens which is attached to the front of an existing lens or compact camera. One that is widely used by macro enthusiasts is the Japanese-made Raynox 250. The macro expert, Johan Ingles-Le Nobel, has stacked the Raynox 150 and 250 lenses together.
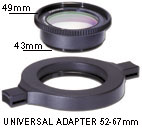
Raynox lens with the supplied clip-on adaptor
I do not use the plastic lens holder shown above. Instead I use 43mm adapter rings of various sizes depending onto which lens I am adding the Raynox. eBay is often the best place to buy step-up or step-down adaptor rings.
Combining a Macro and Supplementary Lens and Extension Tubes in High Resolution Mode

A microscope stage micrometer marked with 1/100 mm (or 10 micrometres) divisions was photographed with 42mm of extension rings and a Raynox 250 supplementary lens added to an 60 mm macro at F4. The camera body was set to high resolution mode (sensor shifting) to produce 80MB Raw files. Shown at full resolution.
Adding a Supplementary Lens (or Filter) to a Compact Camera
You can attach a magnifying lens (and filters) to a compact camera even although it might be made of plastic and not have any screw thread. The Magfilter adaptor is a magnetic device that comes with a stick-on metal ring (which can be removed with dental floss).
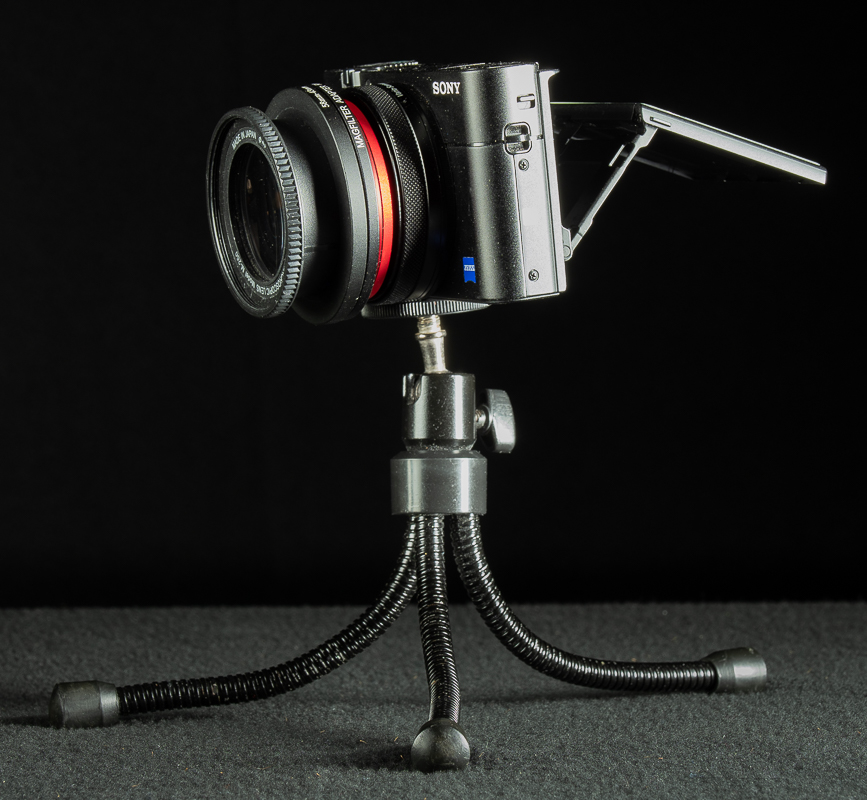
Sony RX100 mark V pocket camera with a Magfilter adaptor attached. A stepdown adaptor ring is attached to the Magfilter and that has Raynox 250 lens screwed on to it. The whole set up is very light enough to be supported a very small tripod with flexible legs. Please Note that the adaptor ring and lens is almost too heavy for the Magfilter so care should be exercised if using this configuration hand held.
The equipment above was able to detect individual butterfly wing scales as tiny patches of colour
Focus Peaking Display
Use magnified focus assistance, and/or the focus peaking display setting in your camera or phone to know the point of focus and the limits of focus depth. You might need to set focus peaking options to maximally obvious as shown in the video below.
Using a light source
When using macro with living creatures sometimes an artificial source of light is required. Cheap brands of on-camera macro light are available. Flashes can also be used off camera with radio controllers. Battery powered LED Torches and lights can be useful in the filed and mains powered LED bulbs work well with diffusers.
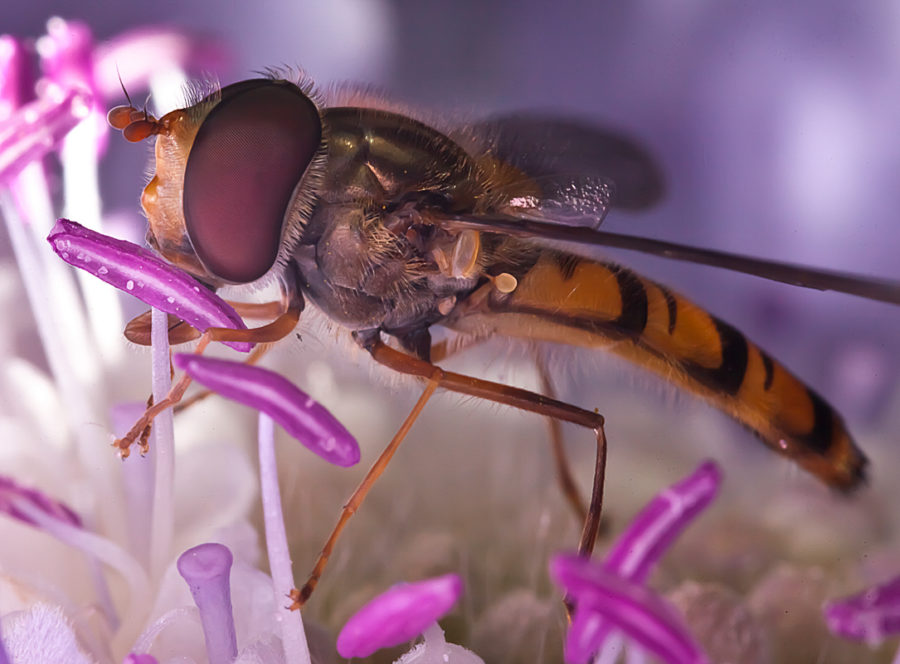
Taken with an old Sigma 105 mm macro lens and a macro flash at F18. Note how shallow the depth of field is even at the very small aperture used. Flash was both required to produce enough light and freeze the frenetic activity of this fruit fly as it ate the pollen. Note also that the resolution is limited by the very small aperture which was used.
Learning Resources for Macro
Great common sense advice advice from Neil Fisher in his 21 minute ‘Introduction to Macro’.
Photomacrography.net is probably the world’s most useful public macro forum for amateur photographers.
extreme-macro.co.uk is probably the best website on the planet to learn about extreme macro techniques.
The Alan Walls Photography YouTube channel can probably teach you at least 90% of everything that you need to know about macro photography. That is why I follow his channel.
Tips and images by: Steve Campbell