Hints, Tips and Recommendations:
Bird Photography
Bird Photography for Beginners
Suitable places for Bird Photography near Milngavie and Bearsden
Mugdock Country Park
Loch Ardinning
Mugdock Reservoir network
Allander Water, east or west of the Tickled Trout
Any accesssible part of the River Kelvin eg Torrance
Dawsholm Park ( parakeets there recently )
Kilmardinny loch
Tannoch loch
Any section of the West Highland Way


The images above were all taken in the summer of 2020 using the tips described below. They were taken with a full frame camera and have been quite heavily cropped after some treatment in Lightroom. The location was Craigend Pond , behind the Garden Centre at Mugdock Country Park. The little grebes had two different nest sites over the summer and two successful broods – by sitting in the one location, they would frequently pop up right in front of me with fish for their youngsters. No need for a long lens when this happens. Another highlight was the mallard ducklings – after leaving the nest they would scamper over the lily leaves for their first few days freedom, before gaining weight and having to stay on the water. There was even an American rarity flew in one day – a drake ring-necked duck ! Each day I took 500 + images and I was still going through them weeks later – happy days !
Websites to help get you started
RSPB-Royal Society for the Protection of Birds
SOC – Scottish Ornithologists’ Club
WWT – Wildfowl and Wetlands Trust
BTO – British Trust for Ornithology
Phone App
Where to Watch Birds in Scotland, SOC’s free mobile app
Be Patient
Be prepared for periods of almost total inactivity on the part of the wildlife – there are no certainties with nature but the rewards can be well worthwhile.
Equipment Tips for Beginners
In terms of equipment you will need a fairly long lens in the order of 300mm plus. Consider using a converter to get some extra length.
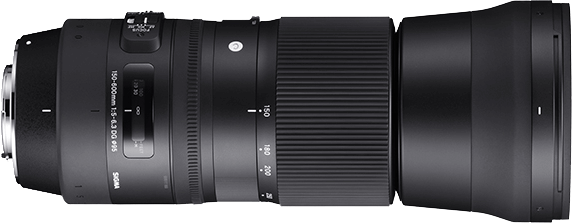
You may wish to think about purchasing a telephoto lens and the Sigma 150-600, which would be ideal if you have a Canon or Nikon body.
I would also recommend considering purchasing second hand – there are many suppliers online but Ffordes and MPB are reputable stockists. There is also the option to hire or borrow a lens from a friend.
More and more, enthusiasts are switching from traditional DSLR’s to lightweight mirrorless systems. These have the benefit of handheld flexibility with their impressive inbuilt stabilisation and noise free operation which can be a real bonus if you are in close proximity to any species
When on location do not wear bright clothing – browns and greens are the norm but black will also suffice
Take binoculars with you if you have them, they can prove to be very useful
Monopods are handy if you are moving about, especially over uneven ground. My preferred tactic is to find a spot with good light, setup a comfy folding chair and use my tripod. I have effectively become a static object and hopefully pose no threat to any target species. It sometimes works if you let the species come to you, as opposed to chasing it !
A word of warning
Watch out for children being in your field of view, albeit in the distance. I had my only ever upsetting experience after being confronted by an irate parent convinced I had been photographing his children.
Social Networking In Person and Online
Take the opportunity, if it arises, to talk to people you encounter, especially those with a camera or binoculars. It’s amazing what you can learn and you may have some information on a recent sighting you are willing to share as well.
There are a wide range of social media groups for Regions of Scotland that carry excellent data on recent sightings at the location you are heading for. You may wish to join / follow a Group at no cost to yourself and this is particularly useful if you make frequent visits to this Region.
In Woods
In woodland areas, proceed at a gentle pace and slowly work a location. You probably are best leaving your tripod at home. Stay as quiet as possible, put your phone on silent mode and avoid any sudden movements. Don’t be afraid to retrace your steps if the habitat you have already passed looks/ sounds promising . Take a friend as, with two sets of eyes and ears, you double your chances of spotting something. Remember the mantra – stop, look and most importantly, LISTEN.
Birds in Flight
In this “Birds in Flight Photography” by Phil Gower discusses his “Five S’s”: Settings, Skill, Set-up, Study, Style and Story . After you have watched the video come back to John Hannah’s pictures above and note the ‘story’ components. Also see Phil Gower’s Flickr Collection >