Hints, Tips and Recommendations:
Using ‘Apply Image’ in Photoshop to Selectively Modify Particular Areas
Editor’s Note: In this page Margaret Campbell introduces us to a very simple method of targeting image adjustment layers in a very selective way. It might initially look complicated but it is really very easy and quick to use and can save you lots of time that would otherwise be spent painting masks with a brush. Margaret also shows us how to do this without buying and installing a Photoshop extension!
____________________________
If you do not know what adjustment layers are in Adobe Photoshop you could benefit by watching this short video before reading more.
Explanation
‘Apply Image’ can select and allow adjustment of areas of an image which are either too dark or too light.
Apply Image, a strange name, really stands for – apply the image to the image. It uses the information from the original image and applies it to a Layer Mask so that exact areas of the light to dark pixels can be identified. The resulting selection can then be used to lighten the dark areas, darken too light areas,
change colours and other alterations by using an Adjustment Layer.
Simple List of Steps (Illustrated below)
- Open the image and add a Curves adjustment layer. A new layer will open with a white
mask. - Click on the mask thumbnail.
- From the drop-down menu choose Image>Apply Image, then copy either the background, a different layer or merged layers.
- Then choose a Blend Mode – usually Multiply.
- To show the mask as a mono version of the background image, Alt/Click the mask thumbnail.
- Click the adjustment layer icon to return to colour (i.e. the image rather than the mask)
- Make any adjustments that are required
An Illustrated Example
a) Target Light Areas
Open an image and add an adjustment layer by clicking on the icon at the base of the Layers palette.
Choose Curves from the list. A new layer will open with a mask thumbnail which should be white (as shown in the image below).

Click on the mask thumbnail (as shown in the image above) then select the menu option Image >Apply Image.
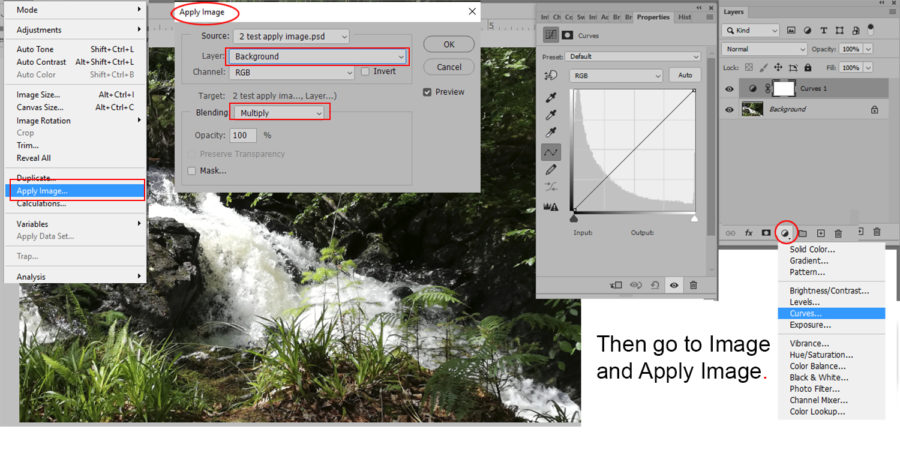
In the Apply Image panel select Background from the list, and Multiply in the blend Layers choices and click OK.
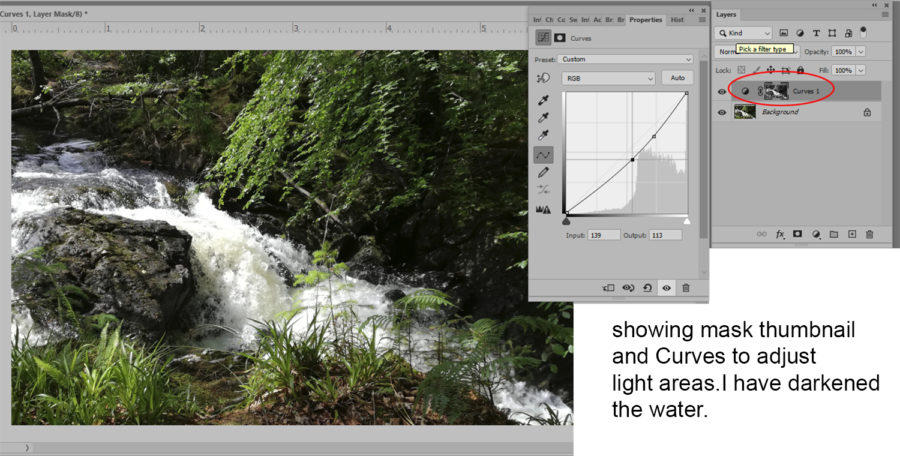
The mask thumbnail will contain a mono version of the background image. To see this enlarged Alt/Click the mask thumbnail. Any adjustment you apply will be targeted to the light parts of the mask.
On a mask ‘Black conceals and White reveals’ the changes created by an adjustment.
Now click the layer icon and the colour returns and a Curves panel appears. Make any adjustments to the curve that you require.
b) Target Dark Areas with an Inverted Mask
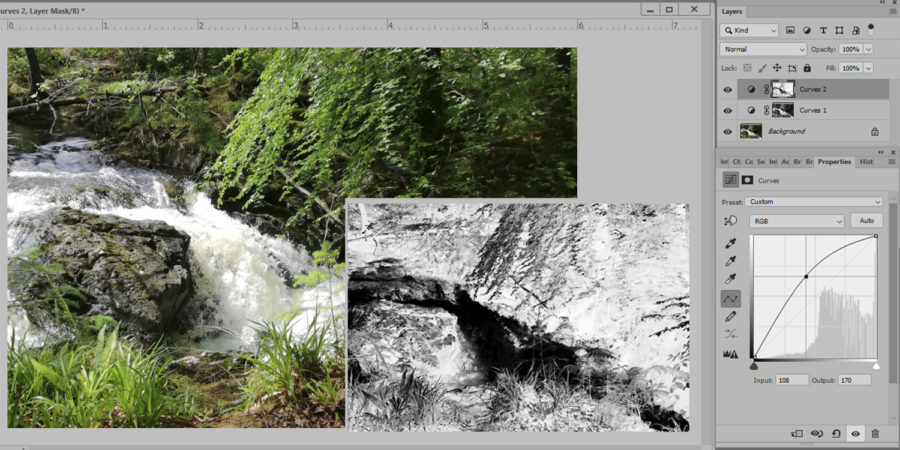
To target the DARK areas, add another curves adjustment layer (Curves 2 in the image above).
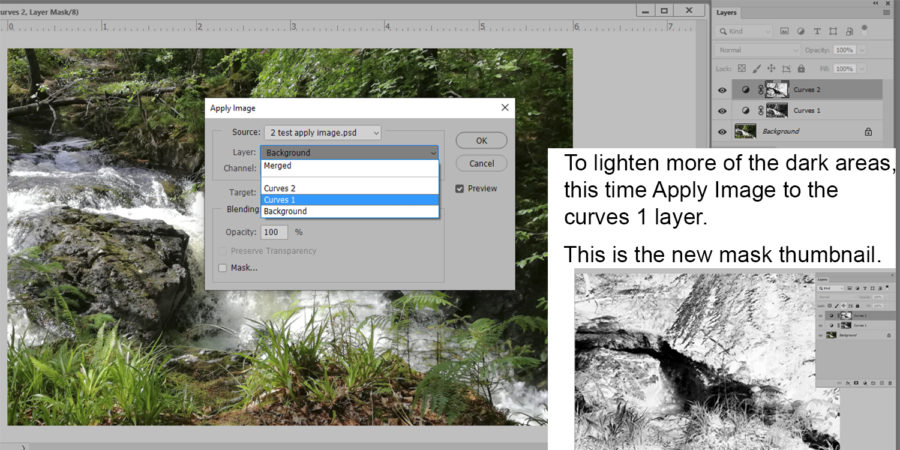
Repeat APPLY IMAGE and this time select Curves 2 instead of Background. The mask thumbnail will change.
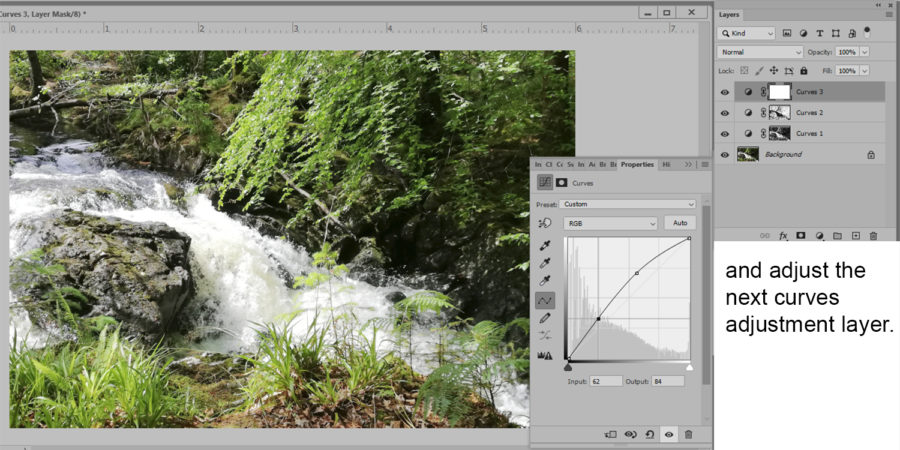
Then, as before, Image>Apply Image and this time click INVERT. The thumbnail will be the reverse of that seen Curves 1 layer. Adjust the curve as required
Further Refinements and Uses
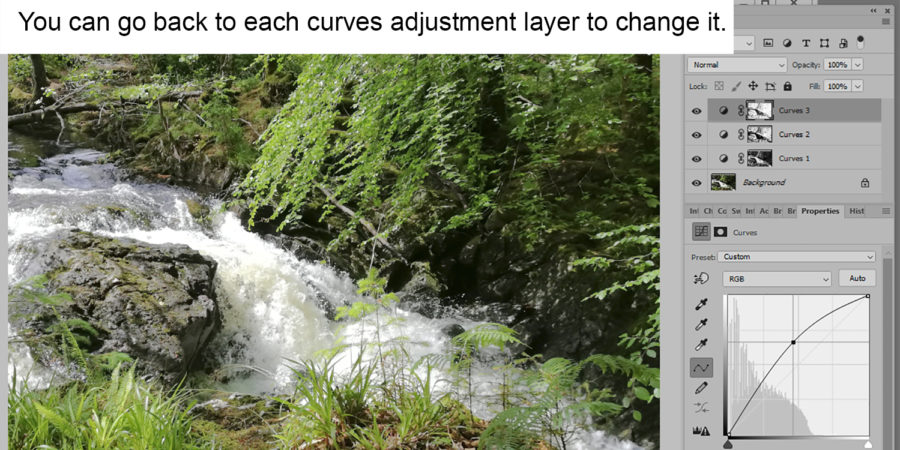
All the adjustment layer settings can be modified. You can go back to each adjustment layer to change the settings until the image is as you want. It is a good idea to save the image at each stage so you can go back after making a mistake.
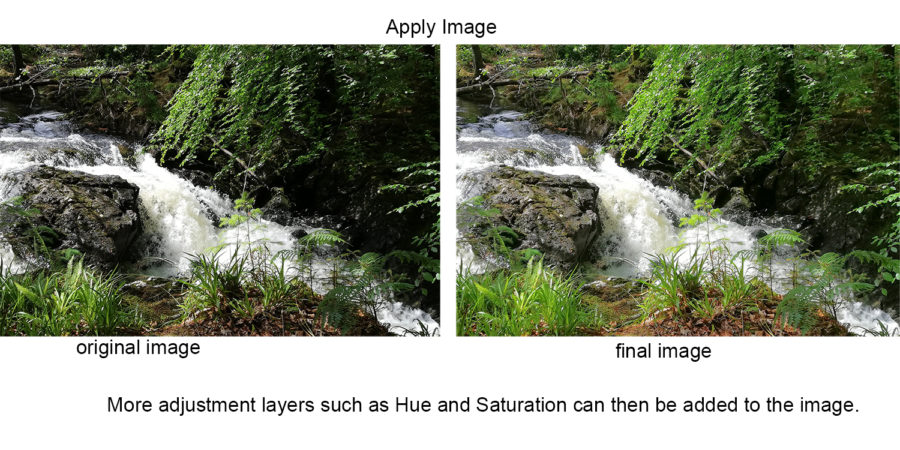
‘Apply Image’ can be used for a lot of other ways of changing an image using different blend modes, colour toning and dodging and burning.
Tips by: Margaret Campbell
In addition to what Margaret shows above it is very easy to ‘tune’ or refine the mask to your needs. Only 2 steps are required.
- Alt+click on the mask icon in the layers panel to show the mask.
- Use the menus choice Image >Adjustment> Curves to adjust the mask
Note these steps change the mask not the image.
Further Reading
- https://helpx.adobe.com/uk/photoshop/how-to/edit-image-layer-mask.html
- https://fstoppers.com/education/using-apply-image-layer-masks-photoshop-206510
- https://www.laurencebaker.org/apply-image-in-photoshop-explained/
Tips by Steve Campbell